
The 'Specular-Refraction' Method: Achieving Hyper-Realistic Chrome Finishes on Textured Surfaces
Learn the precise chemical layering and buffing techniques required to achieve a flawless, mirror-like chrome finish over heavy 3D relief textures without surface cracking.
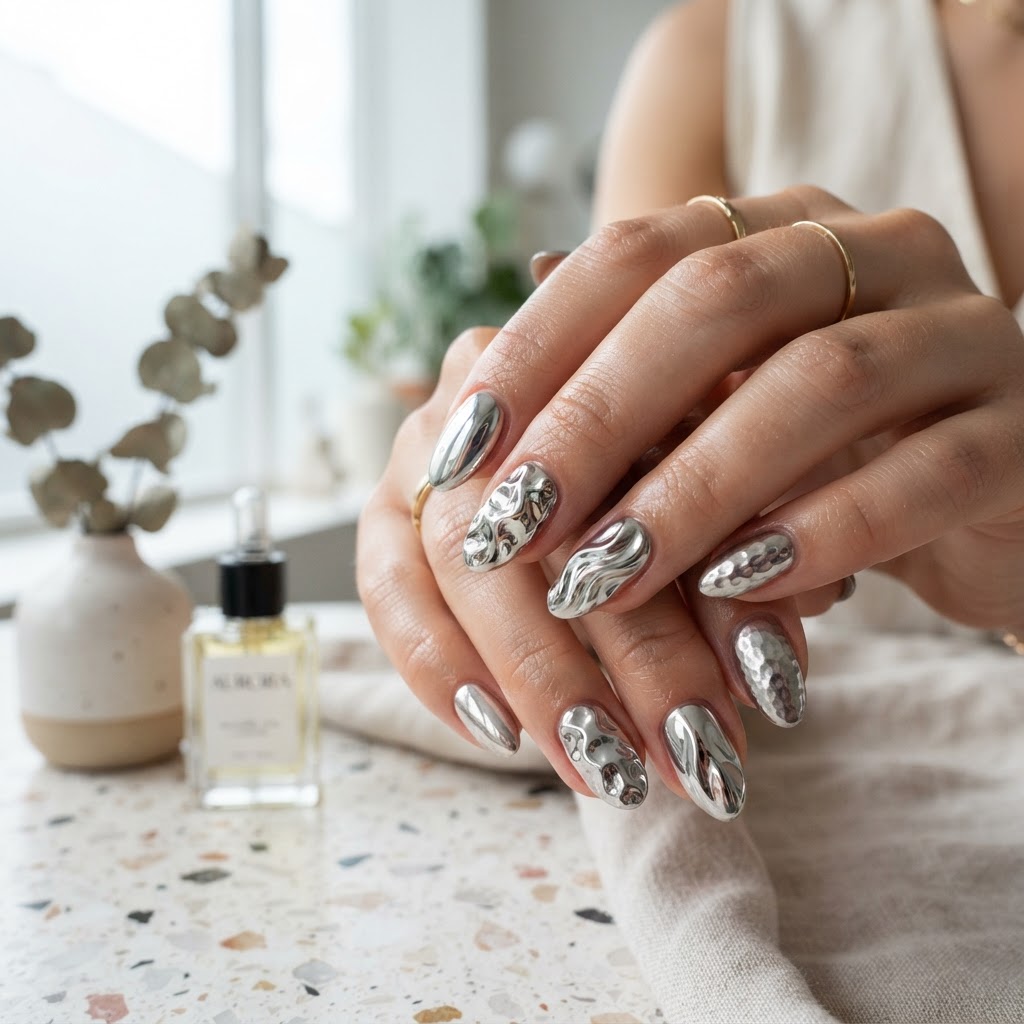
The Challenge of Chrome on Texture
Applying mirror powders over traditional smooth surfaces is straightforward, but achieving a flawless, high-shine chrome finish over 3D relief or heavy gel textures often results in dull spots, 'cracking' in the reflection, or uneven pigment distribution. The 'Specular-Refraction' method is designed to stabilize the metallic particles across non-planar surfaces by managing the surface tension of the tack-free layer.
Phase 1: The Foundation of Surface Tension
The secret to a high-shine chrome finish on relief art is the 'buffer layer.' If you apply your top coat over heavy 3D art too thinly, the gel will pull away from the peaks of the art, leaving microscopic gaps that lead to surface oxidation and loss of luster.
Phase 2: The Particle-Migration Technique
Join the newsletter
Get fresh nail tutorials, trends, and business tips straight to your inbox.
Using an eyeshadow applicator is often too aggressive for complex relief work, as it forces pigment into the valleys while stripping it from the peaks. Instead, use a soft silicone-tipped brush or a lint-free cosmetic sponge.
* Apply in Circular Micro-Motions: Do not drag the pigment. Use a soft, circular tapping motion to 'deposit' the particles rather than 'rubbing' them. This ensures the metallic platelets lay flat against the peaks of your 3D work.
* The 'Specular-Refraction' Polish: Once covered, take a clean, dry, extra-soft makeup brush and buff lightly in a figure-eight pattern. This movement aligns the metallic particles, creating a continuous refractive surface that mimics liquid metal.
Phase 3: Sealing the Mirror
Most chrome finishes fail at the sealing stage because the solvent in standard top coats can dissolve the metallic particles, creating a grainy finish. To avoid this:
Troubleshooting Common Failures
* Cloudy Finish: Usually caused by over-curing the initial buffer layer. If the gel is too hard, the pigment won't adhere properly to the surface, causing the 'cloudy' look.
* Chrome Flaking: This is often a result of 'contact-surface' fatigue. Ensure you are removing any loose excess dust with a soft brush *before* applying the clear base coat. The excess dust creates a barrier that prevents the top coat from bonding to the nail structure.
By treating the chrome application as a multi-stage engineering process rather than a final cosmetic step, you ensure the longevity and professional appearance of your high-impact nail designs.
Join the newsletter
Get fresh nail tutorials, trends, and business tips straight to your inbox.
