
The 'Refractive-Depth' Layering: Achieving 3D Transparency in Encapsulated Gel Art
Master the physics of light refraction to create depth and dimension in encapsulated gel designs, moving beyond flat layers to professional-grade dimensional artistry.
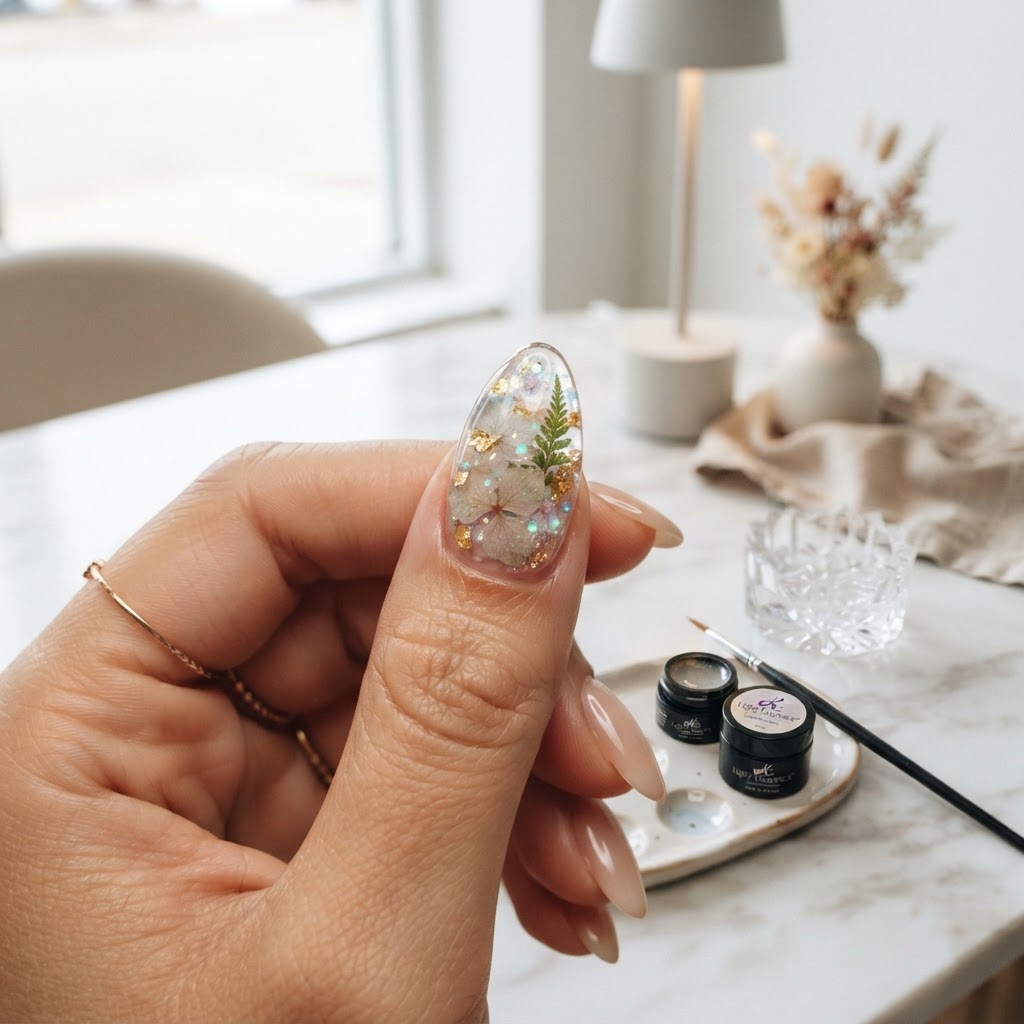
Understanding Refraction in Gel Art
To achieve true depth in encapsulated nail art, you must move beyond simply layering glitter and charms. The goal is to manipulate how light travels through your gel layers, creating a sense of 'infinity' or deep-space volume. This requires an understanding of how refractive indices work within different gel viscosities.
The Physics of Depth
When light hits a clear, high-viscosity builder gel, it refracts—it bends. By layering translucent pigments or micro-iridescent particles at varying depths of your sculpture, you create a refractive field. If you place a solid object, like a metallic charm, at the deepest point of the extension and cover it with clear structural gel, it appears smaller and further away. If you then add a secondary, thinner layer of semi-translucent gel over that, you create a ‘haze’ that adds the perception of atmospheric distance.
The Three-Stage Refraction Technique
This method requires a minimum of three distinct layering phases to ensure the light has a path to follow.
Join the newsletter
Get fresh nail tutorials, trends, and business tips straight to your inbox.
* Phase 1: The Foundation Depth. After applying your clear base layer, apply your most reflective elements (chrome flakes, holographic shards) directly to the base. Cure. This is your 'floor.'
* Phase 2: The Translucent Filter. Apply a thin, semi-sheer layer of colored builder gel (such as a 'jelly' tint). This layer acts as a color-filter, changing how light reflects off your Phase 1 elements. The thickness of this layer determines the 'mood' of the depth.
* Phase 3: The Refractive Cap. Before your final structural clear coat, place tiny, light-catching items (like micro-bubbles or floating metallic dust). By keeping these closer to the surface, they appear sharp, while the Phase 1 elements remain soft and distant.
Troubleshooting Clarity and Bubbles
One of the biggest enemies of the refractive look is micro-bubbles trapped during the multi-layering process. To maintain optical clarity:
Maximizing the Impact for Social Media
Because this technique relies on light interaction, it is notoriously difficult to photograph. To properly capture the depth of your encapsulated designs for your portfolio:
* Use Point-Source Lighting: A single, focused LED lamp creates a sharper refractive beam through the gel than diffused studio lighting.
* Macro-Angle Panning: Move your camera slowly in an arc around the nail while filming. This 'parallax' effect highlights the distance between the layers, allowing the viewer to see the individual depths within the nail, which is essential for proving the complexity of your work to prospective clients.
Join the newsletter
Get fresh nail tutorials, trends, and business tips straight to your inbox.
