
The 'ChromaShift' Technique: Achieving Seamless, Multi-Dimensional Color Transitions on Natural Nails
Unlock the secrets to creating captivating, multi-tonal color effects that move beyond basic ombré. This tutorial breaks down the 'ChromaShift' technique for stunning, depth-filled manicures.
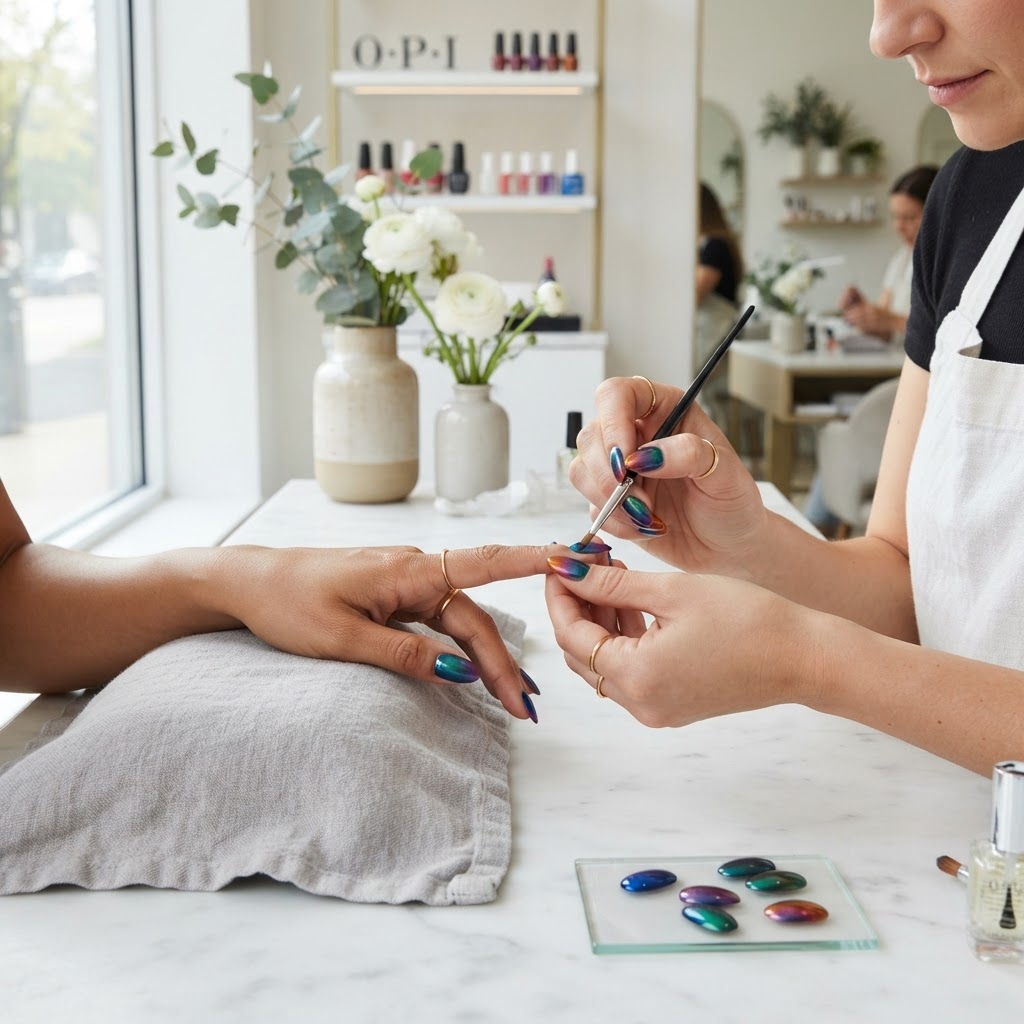
Beyond the Blend: Mastering Multi-Dimensional Color Transitions
Ombré has been a staple in nail art for years, offering a beautiful gradient effect. But what if you could elevate your color work beyond a simple two-tone fade? The 'ChromaShift' technique allows nail artists to create seamless, multi-dimensional color transitions that mimic the way light plays across iridescent surfaces, adding unparalleled depth and visual interest to natural nails.
This technique requires a precise understanding of color theory, strategic product application, and a delicate touch. It’s about layering and blending multiple shades in a way that creates a fluid, almost living color effect, rather than distinct bands of color.
What You'll Need:
* High-Quality Gel Polishes: Choose 3-5 shades that are complementary or offer a striking contrast. Consider a progression of light to dark, or a blend of analogous colors for a softer effect.
* A Fine Detailing Brush: A brush with a very fine tip is crucial for blending edges and adding subtle accents.
* A No-Wipe Top Coat: Essential for sealing the design without dulling the vibrancy.
* Your Standard Gel Application Tools: Base coat, lamp, cleanser, lint-free wipes.
* Optional: Fine Glitter or Iridescent Pigments: For added dimension and shimmer.
The ChromaShift Process:
This technique is best executed on a well-prepped natural nail or a perfectly applied gel base. Ensure the nail is clean, dry, and free of any oils.
#### Step 1: The Foundation Layer
Join the newsletter
Get fresh nail tutorials, trends, and business tips straight to your inbox.
#### Step 2: Building the Shift
#### Step 3: Refining the Transition
#### Step 4: The Final Layer
Tips for Success:
* Work in Thin Layers: This technique relies on the wet-on-wet application of multiple thin coats. Thick layers will become muddy and difficult to blend.
* Clean Your Brush Frequently: A clean brush is essential for achieving smooth blends. Don't be afraid to wipe it on a lint-free wipe often.
* Less is More: Start with minimal product on your brush and build up as needed. It's easier to add color than to take it away.
* Practice on Swatches: Before trying this on a client, practice on nail tips or a swatch stick to get a feel for the blending.
* Consider Color Placement: Think about where you want the color shifts to be most dramatic. Placing darker shades at the base and lighter shades towards the tip can create an elongating effect.
* Experiment with Finishes: Combine matte and glossy top coats for an even more dynamic effect.
The 'ChromaShift' technique offers a sophisticated approach to color on the nails. By mastering these steps, you can elevate your manicures from standard to show-stopping, providing clients with truly unique and eye-catching nail art.
Join the newsletter
Get fresh nail tutorials, trends, and business tips straight to your inbox.
