
Fall Nail Designs for Every Shape and Length
Browse fall nail designs by shape, length, and finish—mocha, burgundy, olive, tortoiseshell, chrome—then preview any look before you commit to it.
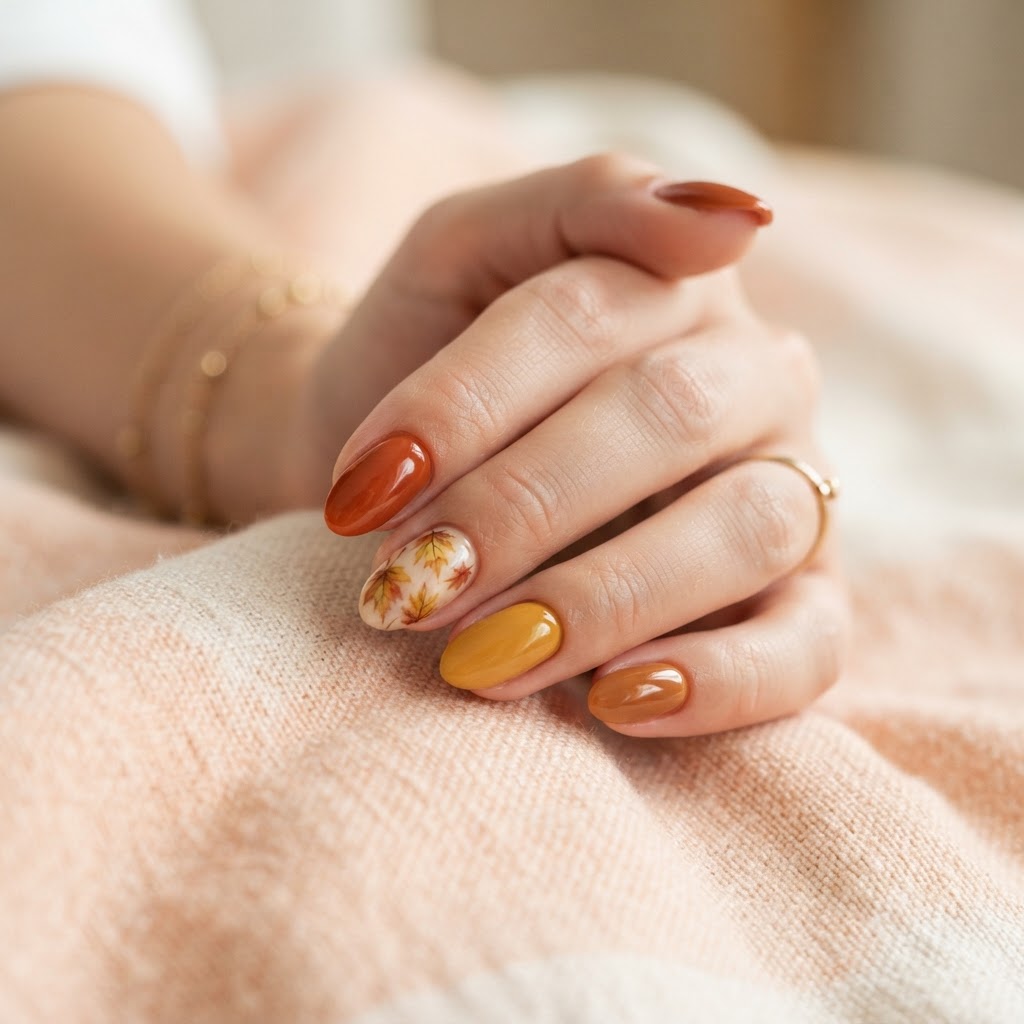
Fall nail designs this season lean warm and a little moody, running through deep mocha, burgundy, olive, tortoiseshell, and chrome. If you want nails that feel like the season without looking like a costume, this guide breaks down fourteen specific looks by shape and length, so you can find one that actually fits your hands and your life.
Before you buy polish or book an appointment, you can preview any of these looks on your own hand shape in the AI Nail Design Studio. Pick your style, length, and shape, add the colors or finish you like, and get back a realistic design along with the color list and steps to copy it.
Scroll through the looks below, then read the sections after on picking the right one for you, mistakes to skip, and how to get the same design in regular polish, gel, or press-ons.
Fall Nail Designs by Shape and Length
Mocha Chrome Almond
A deep mocha brown base topped with a fine chrome powder gives a soft metallic sheen instead of a mirror shine. This one suits almond-shaped nails at medium length, since the tapered tip catches light along the whole nail. It's medium difficulty at home because chrome powder needs a tacky topcoat and even pressure to avoid streaks. Buff the chrome in with a soft sponge instead of a brush so the color goes on smooth.
Burgundy Velvet Square
This look uses a matte burgundy with a hint of brown underneath, like dried wine. It works best on square nails at short to medium length, where the flat tip keeps a matte finish looking crisp. It's easy to do at home since matte topcoats forgive small brush strokes better than glossy ones do. Let each color coat dry fully before the matte topcoat, or the finish can look cloudy in spots.
Olive Milk Bath Coffin
A sheer, milky white base fades into a thin wash of olive green near the tip. It suits coffin-shaped nails at a longer length, since the squared tip gives the fade more room to show. It's medium difficulty, because blending two sheer colors without a hard line takes a little practice. Dab the olive on with a makeup sponge while the base coat is still slightly tacky.
Tortoiseshell Swirl Round
Amber, brown, and black are swirled together to mimic real tortoiseshell. This pattern reads clearest on round nails at a shorter length, where you don't need a long canvas to see it. It's medium difficulty since swirling needs a light hand with a thin brush. Work on one nail at a time and wipe the brush between colors so they don't turn muddy.
Mocha Linen Matte Oval
This is a flat mocha brown with a matte, slightly textured finish that looks like woven linen. It suits oval nails at medium length, since the rounded shape softens the matte texture. It's easy at home and forgiving of small application mistakes. Use a textured matte topcoat rather than trying to create texture by hand.
Burgundy Marble Almond
Burgundy and white are marbled together in loose, uneven veins. This works on almond nails at medium to long length, giving the marbling enough room to spread naturally. It's harder to do at home since marbling needs thin paint and quick timing before it dries. Use a dotting tool, not a brush, to drag the colors into veins.
Olive French Tip Square
A sheer nude base is paired with an olive green tip instead of the usual white. It suits square nails at medium length, where a straight tip line looks the cleanest. It's easy to moderate at home, since French tips mostly come down to a steady hand or a guide sticker. Use striping tape to mark the tip line before you paint if your hand shakes.
Chrome Copper Stiletto
A warm copper chrome finish covers the whole nail with no base color showing through. This one suits stiletto nails at a longer length, since the pointed shape shows off the metallic shine from every angle. It's harder to do at home, since chrome on a pointed, curved nail needs careful buffing into the edges. Apply the chrome powder in small circular motions rather than one long swipe.
Tortoiseshell Accent Coffin
Most nails wear a solid mocha base, with one accent nail painted in a tortoiseshell pattern. It works well on coffin nails at medium length, since the flat square shape gives the pattern a clean edge to sit inside. It's medium difficulty, mostly because of the accent nail itself, while the rest of the set is simple. Pick the ring finger for the accent nail so it stands out without taking over the whole set.
Deep Plum Glass Round
A deep plum jelly polish is built up in thin, glossy layers for a glass-like finish. It suits round nails at medium length, where the glossy curve catches light evenly. It's easy at home if you're patient with drying time between coats. Apply very thin layers and wait longer than usual between coats, since jelly polish stays soft if it's rushed.
Mocha Mauve Ombre Oval
Mocha brown blends into a soft mauve pink from base to tip. This gradient suits oval nails at short to medium length, since the shape doesn't need much room for the color to transition. It's medium difficulty, since ombre takes a sponge and a bit of trial and error. Practice the sponge blend on a plastic sheet first so you can see how the colors mix before touching your nail.
Burgundy Chrome Fade Square
Burgundy polish fades into a chrome finish partway up the nail, so the tip looks metallic while the base stays matte-dark. It works on square nails at medium length, where the fade line sits neatly across the flat tip. It's harder to do at home, since you're combining two different finishes on one nail. Apply the chrome powder only after the burgundy section is fully cured, so the powder doesn't stick where it shouldn't.
Olive Chrome Ombre Coffin
Olive green fades into a soft chrome shimmer near the tip, blending a matte color with a metallic one. It suits coffin nails at a longer length, giving the gradient enough space to read clearly. It's medium to hard difficulty because of the finish change partway through the fade. Seal the olive section with a thin topcoat before adding chrome powder so the two layers don't blend into mud.
Join the newsletter
Get fresh nail tutorials, trends, and business tips straight to your inbox.
Tortoiseshell Milk French Round
A milky white French tip sits over a base painted in a soft tortoiseshell pattern. It works on round nails at medium length, where the round tip softens the look of the French line. It's medium difficulty, since you're combining a tip guide with a hand-painted pattern underneath. Paint the tortoiseshell base first and let it dry completely before adding the white tip, so the colors don't smear together.
Choosing the Right Look for You
When you're picking from this many fall nail designs, it helps to think about four things: your skin tone, your nail length, your outfits, and how long the set needs to last.
Mistakes to Avoid
Polish, Gel, or Press-Ons: Making Any Look Work
Every look on this list can be done in more than one way, depending on how long you want it to last.
Getting the Look
If you're heading to a nail tech instead of doing it yourself, bring a photo or a saved design and say something like: "I'd like a [shape] shape at [length] length, with a [mocha/burgundy/olive] base and a [chrome/matte/glass] finish, similar to this picture." Being specific about shape, length, color, and finish gets you closer to what you actually pictured.
Try It First in the AI Studio
You don't have to guess how a color or finish will look on your own hands. On the main page, pick a style, occasion, length, and shape, then add the colors, finish, or a reference photo you want to try. You'll get back a realistic design along with its color list, the techniques used, and tips for recreating it. From there you can remix the design, save it to your own library, or share it to the community gallery, all on that same page. Testing a few of these fall nail designs this way before you buy polish or sit down in a chair can save you from a color that looked right in your head but not on your nail.
Frequently Asked Questions
What colors work best for fall nails?
Mocha, burgundy, olive, and warm chrome tones are the core colors for the season, along with tortoiseshell patterns that mix several browns together. You don't need all of them in one set — picking one base color and one finish is usually enough for a cohesive look.
How long should my nails be for ombre or marble designs?
Medium to long nails give ombre and marble patterns enough surface area to show their transitions clearly. On very short nails, these patterns can look cramped, so a solid color or a small accent nail usually reads better.
Can I do tortoiseshell nails at home?
Yes, though it takes a steady hand and a thin brush. Working on one color at a time and wiping your brush between shades keeps the pattern from turning into a solid muddy color instead of distinct swirls.
How long does gel last compared to regular polish?
Gel generally holds its shine and color longer than regular polish before it needs a touch-up, since the gel formula cures hard under UV or LED light. Regular polish is easier to remove and reapply, which makes it a better choice if you like changing your nails often.
What's the easiest fall nail design for a beginner?
A solid matte color like Burgundy Velvet Square or Mocha Linen Matte Oval is the simplest place to start. Matte topcoats hide small brush strokes better than glossy finishes, which makes early mistakes less noticeable.
Will chrome nails work with my skin tone?
Chrome comes in different base tones, so a warmer copper chrome tends to suit warm undertones, while a cooler silver-toned chrome suits cool undertones. If you're not sure which looks better on you, trying both on a preview before committing is the easiest way to check.
Can I get these designs with press-ons instead of polish?
Yes, most of the looks here can be recreated with press-ons, either pre-made in similar colors or custom-shaped to match a specific design. Press-ons are a good option if you want a finished set without drying time.
How do I keep a matte finish from wearing off too fast?
Matte topcoats tend to show wear at the tips first, since that's where hands touch surfaces most. Reapplying a thin layer of matte topcoat every few days, and avoiding heavy hand lotion right before it dries, helps the finish last longer.
Join the newsletter
Get fresh nail tutorials, trends, and business tips straight to your inbox.
